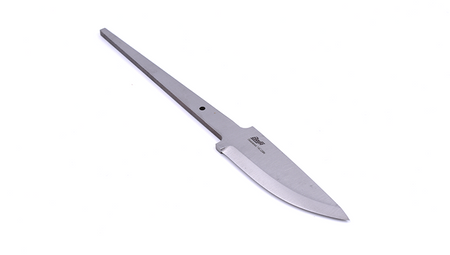
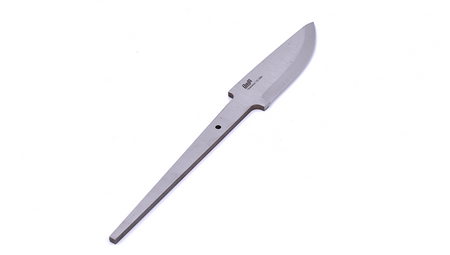
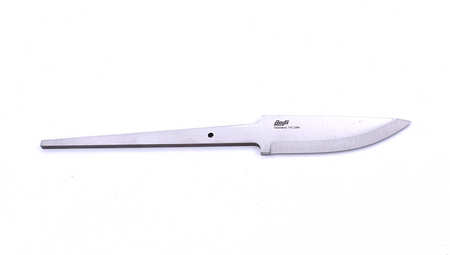
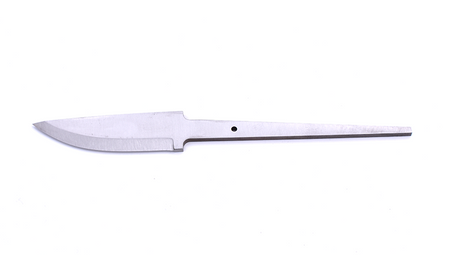
Brisa Farmer 85 S head
Brisa Farmer 85 S head
The blade of the Brisa Farmer knife is designed for a created very strong knife with a Scandinavian twist for everyday work that you can do when you are both indoors and outdoors. Blank 3.5 mm thick and practical scandi grind combined with Sandvik 14C28N stainless steel is perfect for any demanding task.
Head parameters:
- Blade length: 85 mm
- Blade width: 24 mm
- Blade thickness: 3.5 mm
- Overall length: 210 mm
- Steel: Sandvik 14C28N stainless steel
- Grind: Scandi
- Hardness: 59-60 HRC
How to make a handle for a knife and set the blade with a bolt (hidden tang)?
Embedding a knife head with a bolt into a wooden handle using a block of wood, a brass guard and decorative spacers made of reindeer antler or fibers (optional) is a process that requires some skill and tools.
Tools that can be useful for this task:
- Hand saw or jigsaw
- Sandpaper of different gradations such as 100, 220, 400, 600, 800 and 1200
- Drill with drills of different diameters, for example, 3 mm and 5 mm
- Files for wood and metal
- Carpenter's squeeze (optional)
- Angle grinder with discs for sanding wood and metal or belt sander
- Polisher, polishes
Materials needed for this task:
- A block of wood of appropriate size and thickness
- Brass garda - bolster
- Reindeer antler or fibra decorative spacers (optional)
- Two-component adhesive (epoxy resin)
- Finishing materials such as wood oil, wax, etc.
Step 1: Prepare the blade head
Clean the arbor from rust, grease and other contaminants. Trim the mandrel to the appropriate size (no longer than the working length of the drill) if you intend to hide the mandrel entirely in the handle. If you want to refine the head, for example, polish it, put satin, then do it at this stage. Secure head knife before further work, for example, by wrapping it with insulating or painting tape.
Step 2: Prepare the wooden handle
Start by cutting a block of wood to the proper length and thickness to match the size of the head and the planned handle. Align the contact surface of the block with the ew. dividers (guardrails).
Step 3: Cut the holes for the pin
Use a drill to make a hole for the pin in the wood block. Adjust the hole, for example, using a smaller drill or file, so that the pin enters freely.
Step 5: Place decorative elements
Make holes in the decorative spacers corresponding to the diameter of the pin. Finish the surface of the spacers so that they adhere to each other exactly. Place the spacers and guard on the knife shank to check that everything is properly aligned.
Step 6: Glue the pieces together
Prepare two-component glue and apply to the holes of the wooden block. Then place the brass head-bolster with decorative spacers on the head mandrel, lubricate the spacers with glue, similarly the mandrel itself. Place the whole in a wooden block and press down so that the elements are well connected. Remove excess glue from the outside of the handle. You can squeeze the whole thing gently with a carpenter's squeeze and let it dry vertically.
Step 7: Handle machining
After the adhesive has cured. Using a wood file or sander, remove excess wood to make the handle relatively smooth and even. Then use a belt or angle grinder with wood sanding discs to smooth the edges of the wooden handle and brass head. You can do this by hand with sandpaper strips. Use sandpaper with gradations such as 1000, 220, 400, 600, 800 and 1200 to smooth and polish the surface of wood and brass.
Step 8: Finish the handle
Apply wood oil, wax to the wooden handle to protect it from damage and ensure durability. Wait for the surface to dry. Repeat the impregnation several times.
List of knife safety warnings based on requirements
Regulation (EU) 2023/988 on general product safety
(GPSR):
* Risk of injury: Use the knife carefully and always hold it by the handle. The blade is
very sharp and can cause serious cuts. Don't try to catch a falling
knife.
* Safe storage: the knife should be stored in a safe
place, out of reach of children and unauthorized persons. Use a blade guard if
is available.
* Use as intended: Do not use the knife for purposes for which it is not
intended, for example, for opening cans or loosening screws. This can lead to
knife damage or injury.
* Caution when cleaning: Use caution when cleaning the knife,
to avoid cuts. Do not use aggressive cleaning agents that can
damage the blade.
* Blade maintenance: Sharpen the blades regularly to keep them in good condition. Blunt
knives are more dangerous than sharp ones because they require more force, which
increases the risk of slipping.
* Transporting the knife: When transporting the knife, make sure the blade is secured,
for example, by using a vagina or sheath. This prevents accidental injuries.
* Keep your knife clean: Clean the knife regularly to remove any food debris
or other contaminants. This ensures safe and hygienic use.
* Do not modify the knife: Do not try to modify the knife or repair it yourself,
if you don't have the right skills. This can lead to damage to the knife
or injuries.
* Warning for children: knives are intended for adults only. Do not allow
children to use knives without supervision.
* Disposal: Dispose of used or damaged knives in a safe manner to
prevent accidental cuts.
This product is for adults only, who have knowledge and experience in handling sharp cutting tools. Improper use of the knife can lead to serious injury. The blade of the knife is very sharp and can quickly cut through skin and tissues; so always be very careful when slicing and do not bring your hand close to the cutting edge. To avoid slipping of the knife, it is recommended to cut on a stable and non-slip surface and avoid excessive pressure, which can cause uncontrolled movement of the blade.
Be aware that leaving a knife on the edge of a table, countertop or in easy-to-reach places, especially for children, is a danger. The knife should always be properly secured after finishing work, preferably by putting it down on a stable surface or storing it in specially designed blocks, sheaths or on magnetic strips. Never use a knife for tasks for which it is not intended, such as opening cans or using it as a lever, as this risks both damage to the tool and dangerous accidents.
Blunt blades pose an increased risk of injury because they require more force and tend to slip off the material being cut. Therefore, care should be taken to sharpen the knife regularly to maintain optimal sharpness. It is also necessary to clean and dry the tool regularly to prevent corrosion and bacterial growth. It is recommended to periodically inspect the condition of the handle and blade to detect any cracks, chipping or loosening. If damage is found, the knife should be immediately repaired or replaced with a new copy.
When using the knife, focus solely on the task at hand, avoid talking on the phone or watching TV while slicing, and make sure your work area is well-lit. You are reminded that in some countries or regions there are laws restricting the possession and carrying of knives. Before buying or using a knife, it's a good idea to make sure that using it in your location is allowed under the current law.
Adherence to the above rules will enable safe and efficient use of the knife, minimizing the risk of accidents and ensuring the long life of the tool.


